Repacking the wheel bearings on your utility or boat trailer is quick and easy, and you'll avoid the breakdown that'll leave you stranded along the road. How many trailers have you seen on the side of the road this year with one wheel propped up? Don't let it happen to you. If you haven't checked your wheel bearings lately, read this article. You can complete this simple task in about an hour and save yourself a big repair bill.
Many trailer manufacturers recommend this maintenance every year if your trailer gets normal use, or at least every 20,000 miles. To do this job, you’ll need a jack, a pair of jack stands, a large flat-head screwdriver, a hammer and a needle-nose pliers, clean rags, a small pan, about a quart of kerosene and a spray can of brake cleaner.
First, loosen the lug nuts on one wheel and raise the side of the trailer with a jack. Support the trailer with jack stands and then spin the wheel and listen to the trailer bearings. If the wheel spins freely and quietly, proceed with repacking the bearings. If you hear friction or a growling sound, you most likely have a bad bearing or spindle. If this is the case, take the trailer to a service center to get the trailer bearings replaced.
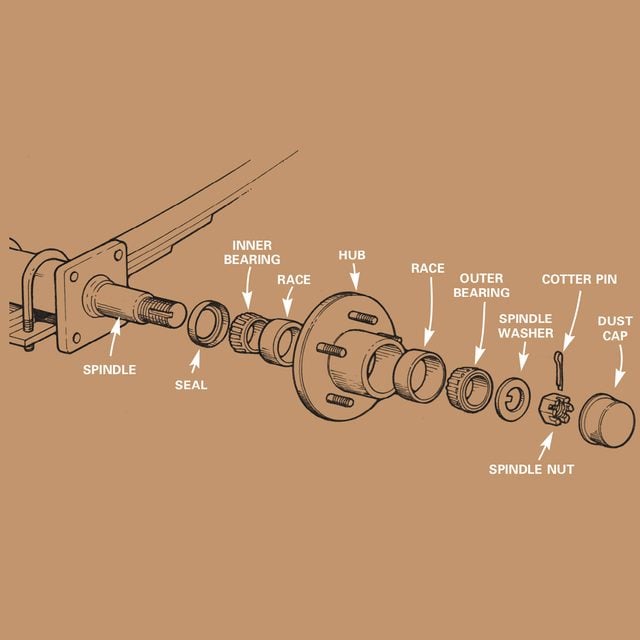
Step 1
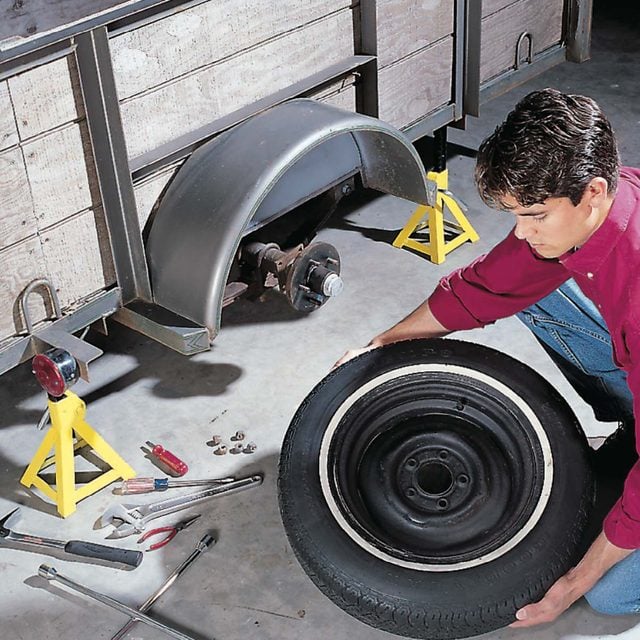
Remove the lug nuts and the wheel. Be sure that the trailer is supported with jack stands and the opposite wheel is blocked.
Step 2
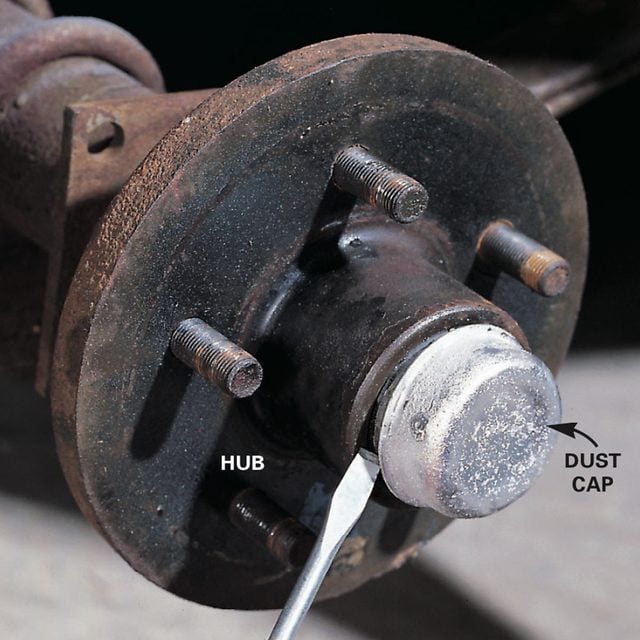
Pry the dust cap loose with a large screwdriver.
Step 3
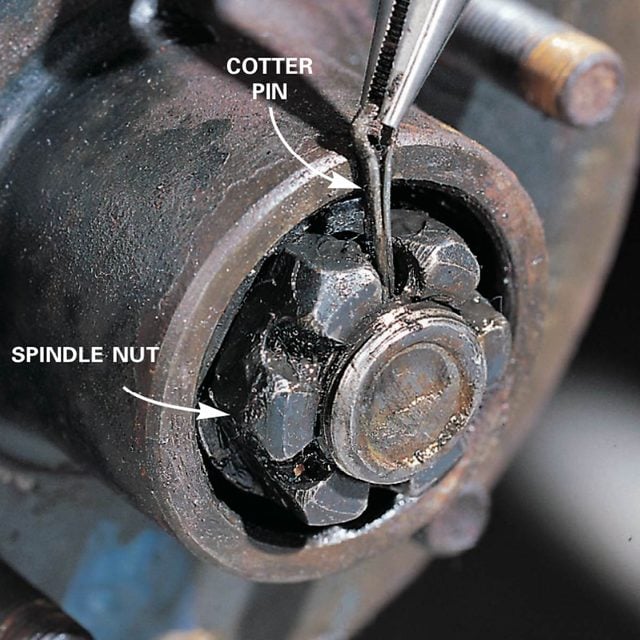
Straighten the ends of the cotter pin and pull it out with needlenose pliers.
Step 4
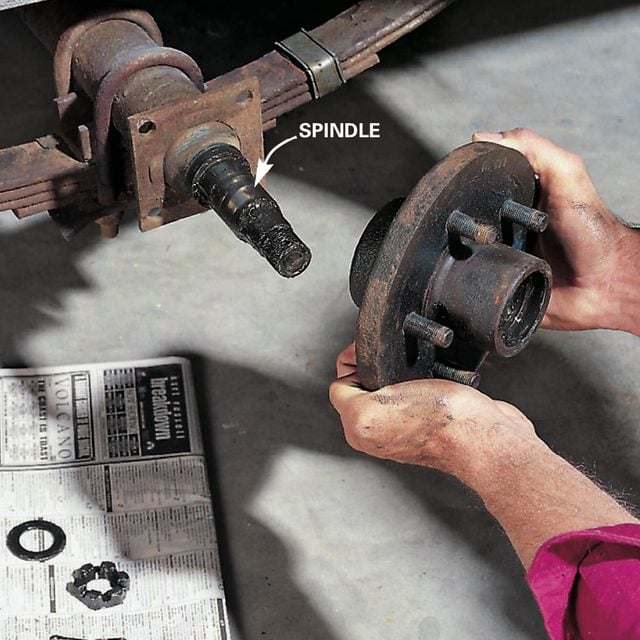
Remove the retaining nut and washer, then pull the hub off the spindle. Be careful—the trailer bearings will come out with the hub. Set the bearings on clean newspaper.
Step 5
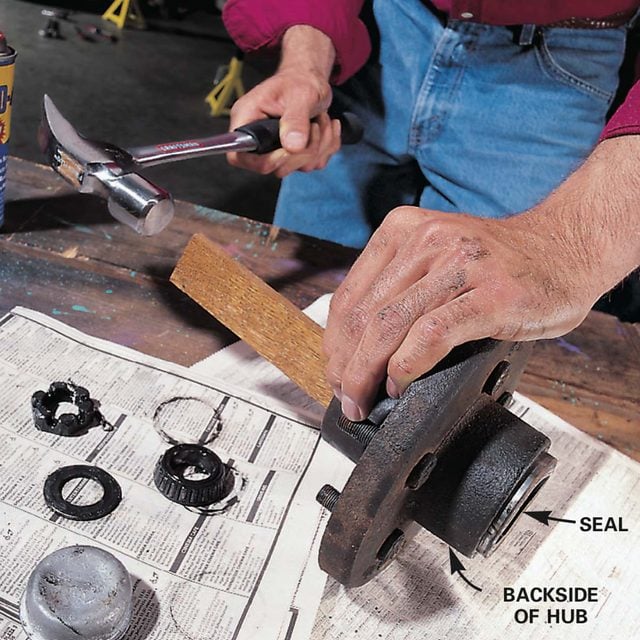
To remove the rear bearing and seal, tap along the rim of the bearing with a block of wood and a hammer. If the seal is rusted to the back of the hub, spray a little WD-40 on the back to help loosen it. If the seal is damaged, replace it. Clean all the grease from the bearings, races and seal with a brush in a small pan of kerosene. Inspect them for signs of wear and replace them if they look suspect. Once the bearings and parts are clean, spray them with brake cleaner and set them aside to dry. Wipe the spindle and the inside of the hub with a clean rag to remove all the grease, and clean them with brake cleaner as well.
Step 6
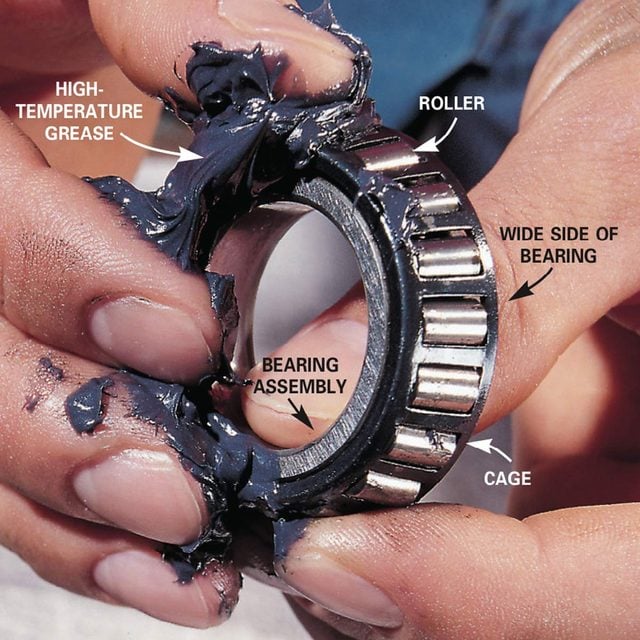
Push the grease into the bearings, working from the wide side of the bearing. Keep pushing the grease into the roller until the cage and rollers are filled. Next coat the inside of the hub with grease. Tap the seal back onto the rear of the hub with a block of wood and hammer, and install the hub and bearings back on the spindle.
Step 7
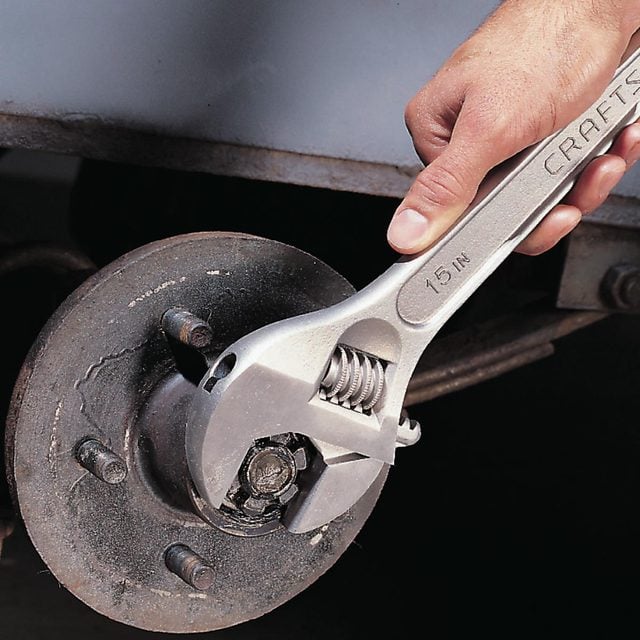
Thread the nut back onto the spindle and turn it clockwise. Spin the hub a few times as you tighten to make sure the bearings are seating properly. Tighten the nut firmly. Now back the nut off about an eighth of a turn until the hole in the spindle aligns with a space in the nut. Push in a new cotter pin (available at hardware and auto parts stores) and bend the ends of the pin to keep it from working its way out. Tap the dust cap back into place. Coat the lug threads with anti-seize compound, reinstall the wheel and tighten the lug nuts. Do the same for each wheel.